
|
Japanese External Reverse Porro Prism Binoculars. VIRTUAL MUSEUM |
|
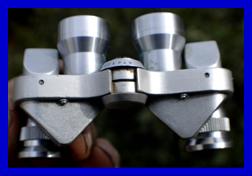
REPAIR SEIZED OCULARS |
|
Like roller skating, unicycle riding, surfing, and needlepoint, there is a learning curve to binocular repair. Like surgery, axe throwing, spitting across the room, and hitting the center of a dart board not everybody is actually capable of doing it, even with practice. And good tools. Read the CAN YOU FIX THESE? page first. Be aware that your FIRST indication that you are incapable of doing this is normally a pile of ruined stuff. You may get frustrated and angry. So it is good to buy a beat up and cheap and junky pair of binoculars to practice on before tearing apart and ruining your best binoculars. Think of that junky pair as being “competence insurance”. |
|
Disclaimers, warnings, weasel words and such. |
|
More disclaimers, warnings, weasel words and such. |
|
The things that are not my fault include (but are not limited to): You listening to me; You not listening to me; What I could have said to save you from yourself but didn’t; You having no/bad/inadequate tools or skills; What you ruin in your repair endeavors; Self inflicted injuries like a screwdriver through the palm of your hand or burns; Consequences (ruined binoculars, bad moods, upset spouses). This is supposed to be a fun learning adventure that enhances your enjoyment and makes you feel good about yourself. If and when it isn’t…(or when things get thrown at walls) then just stop. |
|
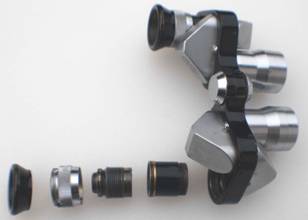
Eyecup Augenmuscheln Ögonmussla Oeilleton D’oculaire |
|
Ocular Okular Oculaire |
|
Prism cover Prismengehäuse Prismmahus |
|
Ocular Barrel Okular Rohr |
|
Diopter ring Einstellring Dioptriring Bague de Rélage Dioptrique |
|
Binoculars Parts Fernglas Teile. Pieces Jumelles. Бинокли детали. Kikare Delar. Piezas Prismáticos. Parti del Binocolo. |
|
Parts names I use. (Independent focus binoculars). Okular Einzeleinstellung. |
|
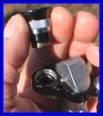
Unscrew the eyecup. Sometimes the eyecup, diopter ring, ocular & ocular barrel will all unscrew from the binocular body as one unit, which is also OK. If so then unscrew the eyecup. |

|
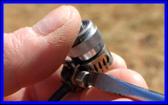
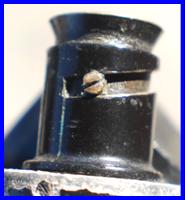
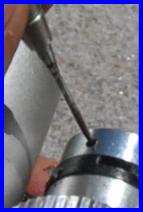
Unscrew the 3 small set screws that hold the diopter ring to the ocular. Use the exact correct screwdriver. Do not unscrew them so far that they fall out. Do this over something to catch them when you do unscrew them too far. |


|
Work the diopter ring off. Sometimes they come right off. Sometimes they rotate but because of tight tolerances and hard optical grease they don't want to come off. Try rocking while pulling energetically. It may help to attach your clamping tool. On rare occasions when they just won’t come apart I have had to heat the ring. |
|
If your ocular and ocular barrel are still attached to the binocular body, unscrew them with your clamping tool.If they are already detached, go to next step. |

|
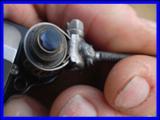
This is the nasty rubbery solidified early optical grease that has seized the ocular into the ocular barrel. NO amount of brute force will free this. Nor will any solvent I have ever tried or heard of. |
|
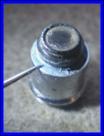
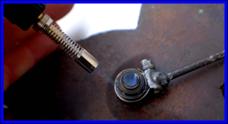
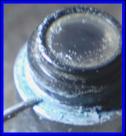
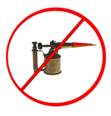
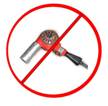
Use your butane pencil torch to heat the join between the ocular and ocular barrel. DO NOT use any other type torch other than a pencil torch. Do not use a hot air gun or oven. Avoid heating the glass. Avoid burning the paint off the ocular barrel. You want it just hot enough to soften the solidified grease so the ocular turns out of the barrel freely. It will often bubble a bit when hot. Do not be afraid to reheat a couple times until you get a feel for what is just hot enough. Handle with the clamping tool as the parts will get too hot for your fingers. Read step 7 before heating. |

|
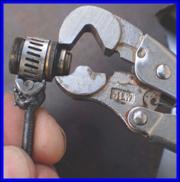
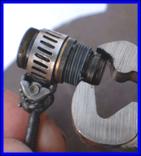
When hot enough the ocular will turn out with very little or no force needed. Use the special vice grips ( with non serrated jaws ) but with the adjusting screw turned out so it is not in a clamping mode. Grip with only modest force: these are easily deformed brass parts, and if you crush them you will usually also break the lens. Do not grip where the threads are. If it doesn’t want to turn very easily, such as you could do with your fingers if it wasn’t too hot for your fingers, then you need a bit more heat. |
|
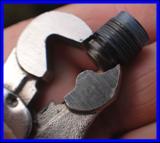
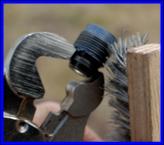
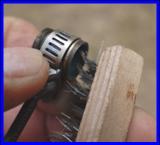
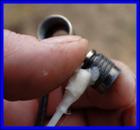
I like to use a hobby wire brush to remove most of the rubbery grease from the ocular threads and from the ocular barrel threads. I do not remove all of it. Ocular or optical grease is not a lubricating grease. The function is to mate parts so they move with controlled friction and without slop. |
|
Binocular frame |
|
If you can find true optical grease of a formulation you like and can obtain, then use it.
I use the expedient of leaving some the old coating for resistance, and adding some easily obtained silicone grease with a cotton swab to the threads to get a free yet solid feel in rotation. |
|
or |
|
Do this on a non flammable base material. In this case...an antique axe head. Do not get carried away. Do not assume red hot or more hot is better. Just hot enough is best. |
|
! |
|
Parts get hot |
|
Direct flame here |
|
Replace the ocular in the ocular barrel and run it in and out until you get a smooth pleasant, and free action. You should be able to do this with your fingers. |

|
After cleaning the accessible lenses if they need cleaning with a cotton swab, replace the ocular and ocular barrel assembly into the binocular body. Start it with your fingers to feel for any cross threading, and stop and start over if any sign of resistance indicative of cross threading is felt. Reattach the clamp tool to snug the last bit. |
|
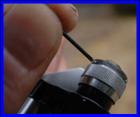
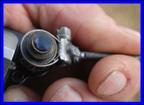
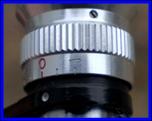
Rotate the ocular in and line up the furthest counter clockwise mark on the diopter ring with a white dot on the frame. Tighten the three set screws on the diopter ring. |
|
Replace the eyecup |


|
Comments on Repairing the Earliest Miniature Binoculars. Kommentare zu Reparieren der frühesten Miniature Ferngläser. Kommentarer Reparera de Tidigaste Miniatyr Kikare. Comentarios Sobre Reparación de las Primeras Prismáticos Miniatura. Commenti Sulla Riparzione del Primo in Miniatura. |
|
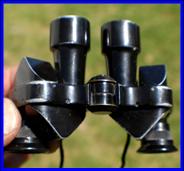
I recently had the opportunity to disassemble and clean a 1920’s pair of Optistar binoculars and a pair of Fata Morgana binoculars. Both the use a slot and pin to cam the ocular assembly in and out, engaged by the eyepiece, rather than having the ocular threaded into the ocular barrel (which is why almost all of the thirty or so 90 year old Fata Morgana and Optistar binoculars that I own arrived with functional rather than seized ocular adjustments). Otherwise the construction throughout was remarkably similar to their 1950’s & 1960’s counterparts. |



|
Cleaning Off Oxides With Wood? Abputsen Von Oxiden Mit Hölzernen Schabern. Nettoyage des Oxydes Avec les Grattoirs en Bois. Удаление коррозии с деревянных инструментов. Herramientas de Madera Para el Rascado de óxidos. |
|
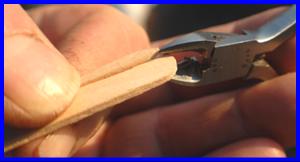
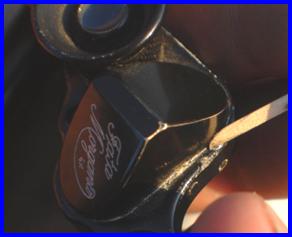
Uncoated zinc alloy and cast aluminum parts form barrier white oxides when they interact with atmospheric oxygen over time. And these white deposits are not uncommon on binoculars, especially at joints where the base material is not painted. No matter how careful you think you can be, cleaning these deposits off with a jewelers screwdriver will result in scratched paint and gouged metal. I like to fashion a tool of wood, using either a flat toothpick (hard to find these days) or by splitting a wooden Popsicle® frozen pop stick, or by splitting a wooden medical tongue depressor. The working concept is that the tool is then softer than either the paint or the soft metal, and if no grit is present, then you should be able to “burnish” the oxide deposits away without scratching or having to have a surgeon’s touch. And it is easy to split or cut that wood to the best shape and size to accommodate your scraping efforts. |
|
Splitting a frozen confectionary (pop)stick to make a burnishing tool. |
|
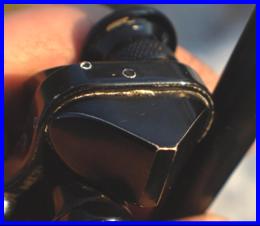
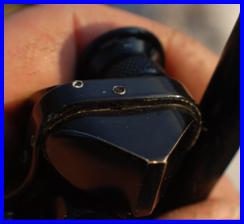
Cleaning oxide deposits on the frame to prism cover joint of black painted Fata Morgana binoculars using a split wooden frozen pop stick. |
|
“Before” and “After” photos representing under 60 seconds effort with a split pop stick on Fata Morgana binoculars. (I did actually use a sharper end than the piece illustrated in the picture on the far left). The cosmetic improvement is fairly dramatic given the truly minimal effort invested. And a small speck of olive oil would make even the tiny remaining residue virtually vanish. |
|
Caveat Emptor ( In Latin: Let the buyer beware ). Lassen Sie Käufer Aufpassen. Laissez L’acheteur Prendre Garde. Пусть покупатель остерегайтесь. Los Compradores Deben Ser Escépticos. Lasciare che L’acquirente si Attenti. |
|
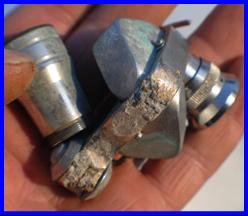
I used to be irritated by the careless optimism and reckless license with which sellers sometimes described their binoculars. But I can normally repair these oversights, so now I mostly ignore them. I recently I picked up at a flea market (boot sale) the saddest example of these small binoculars that I have ever encountered (and the seller gave them to me free, which shows what he thought of them) and I could not resist having some fun using them to illustrate some of the weasel words that are sometimes employed to describe frozen and seized and broken and corroded and incomplete and sad miniature binoculars in on line auctions. |
|
For Sale Wonderful and rare vintage small military? historic famous name WWII German?binoculars, showing much honest wear and age, optics cloudy and could use some cleaning or TLC, some signs of corrosion and patina, not an expert on these so I am unsure how complete these are or how they work. |
|
A description like this... |
|
Can actually mean |
|
Dupe Sought to buy Relic binocular broken in half with half missing that have spent time under water or buried in the ground and have corroded into pieces that are not really remotely useful for much of anything. I know they are abused junk so I am disclaiming any level of intelligence about how bad these really are in the hope that you have poor enough eyesight not to see through my intentionally blurred photos and will use bad judgment and send me entirely undeserved money. |
|
How to repair miniature binoculars. 小型双眼鏡修復 する方法 Anweisungen für die Reparatur von kleinen Ferngläsern Hoe te herstellen miniatuur verrekijker. Comment réparer les jumelles miniatures Hvordan å reparere miniatyr kikkerter Instrucciones para la reparación de los prismáticos en miniatura Hur reparera miniatyr kikare Как отремонтировать миниатюрные бинокль Le istruzioni di riparazione per binocolo in miniatura |
|
Can You Replace Chipped Or Spalled Prisms in Minature Binoculars? Können Sie ersetzen die Prismen Beschadigt en Fernglässer Miniatur? Pouvez-vous Remplacer les Prismes Endomagés dan les Jumelles Miniatures? Вы можете заменить сколов призм в миниатюре бинокль? Byte av Skadade Kikare Prismor. Puede Sustituir los Prismas en Miniatura Prismáticos ? È Possibile Sostiturire I Prismi Scheggiati in Binocoli in Miniatura? |
|
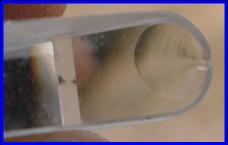
Well...maybe. New replacement prisms are not available, and were probably never available even when these binoculars were new. Even so, relatively few manufacturers made these binoculars for a relatively large number of brand names. So if you have a pile of prisms saved from junk miniature binoculars, and if you are quite lucky, then you may find a prism that is the same size and shape as the broken one, and with the same optical properties. In that case it will function fine, even if came from a different brand name of binoculars. I do attempt this from time to time, and I have had perhaps a 70% or better rate of success doing this. But you probably should view swapping prisms as akin to a game of chance, particularly if not swapping them from identical binoculars.
Brunnen… wäre möglicherweise es möglich. Ein neues Prisma ist nicht verfügbar. Neue Prismen waren vermutlich nie verfügbar. Aber diese Ferngläser wurden durch verhältnismäßig wenige Hersteller produziert. So wenn Sie einige benutzte Prismen von den Miniaturferngläsern haben, ist möglicherweise ein Prisma die selbe Größe und die gleichen optischen Eigenschaften. In diesem Fall konnte das benutzte Prisma arbeiten. Ich habe Erfolg diese Weise manchmal gehabt
Peut-être. Les nouveaux prismes de rechange ne sont pas disponibles et n’étaient pas disponibles quand vos jumelles ont etre a nouvelles. Néanmoins, peu de fabricants ont fait les jumelles miniatures et si vous avez la chance, vous trouvez un prisme de la même propriétés optiques même s’il est venu d'une autre marque de jumelles. J'essaye ceci de temps en temps, et j'ai eu quelques success.
Возможно. Новые сменные линзы не доступны. A используется призма того же размера и оптических свойств от другого бинокли, даже в том случае, если другой марки, может работать. Иногда я имел успех перестановка призм. |
|
Spalled or chipped prism with damage that typically results from being dropped, or too much enthusiasm in tightening the adjusting set screw. Schaden auf dem Prisma. Wenn Ferngläser fallen gelassen werden, resultiert möglicherweise dieser Schaden. Prisme grife avec les dommages d'une chute ou un peu trop d'enthousiasme en serrant la vis. сколоты призмы. Это может быть результатом бинокль падение на землю, или чрезмерного применения силы с призмы винт. |
|
Improvisierte hölzerne werkzeuge sind weicher als zink, aluminum, und gebackene farbe. Hölzerne werkzeuge sind weniger wahscheinlich su verkratzen. Les outils improvisés en bois sont plus mou que le zinc, l’aluminum, la peinture cuite au four. Utiliséz-les soigneusement et vous ne rayeront pas vis jumelles. |
|
Für die Freigabe der Mechanismus der Fokussierung befasst, Wärme einer befassen Butan der Bleistifthalter sorgfältig angewandt zum Schmelzen der altes optisches Fett. Pour libérer le mécanisme de focalisation saisi, la chaleur d'une torche crayon a butane de crayon doit être soigneusement appliquée pour fondre la vieille graisse optique. |
|
Free the Focus Mechanism Bewegung in die Mechanismus der Fokussierung. Restaurer Mouvement dans le canisme pour la focalization. Restaurar el Movimiento en el Centro Mecanismo de Enfoque. Liberi il Meccanimiso do Messa a Fuoco |
|
Objective Barrel Objektive Rohr Objektivrör
|
|
Cleaning Dirty Objective Lenses, IF & CF Binoculars Reinigung Verschmutzter Fernglas Objektive. Nettoyage des Lentilles d'objectif Sales. Очистка загрязненных бинокли объективы. Rengör Smutsiga Kikare Objektiv. Limpieza Sucia Prismáticos de Miniatura Lentes Objetivos. Pulire le lenti Obiettive Sporche. |
|
Some fungus on the objective lens internal surface |
|
( Independent Focus and Ocular Focus binoculars ONLY) Unscrew the ocular barrel counter clockwise using your hands. Do not use pliers. You may use a large hose clamp with handle welded on, or rubber strap wrench, if required. |
|
Clean the inside surface of the objective lens with a bit of cleaner on a cotton swab. It helps to have the long handled cotton swabs that you can purchase on-line. Or improvise. If you think there may be any specks or threads, finish with a puff of canned air . |
|
Clean the exposed prism surface |
|
Reassemble and repeat for the other side |
|
Independent Focus . Einzelbetrieb Fokus, Chaque Optique est Réglable Séparément . Attenzione Indipendente. |
|
Center Focus: the Type Where the Focus Mechanism Adjusts the Objective Lenses. Mitteltreib, Système Point Centrale, Centre Focus Kikare . Centro di Messa a Fuoco. |
|
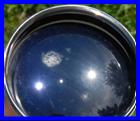
After cleaning the external ocular and objective lenses, if you look into miniature binoculars from the objective end (backwards) and still see dirt or specks of fungus, then they are most likely on the prisms or the internal objective lens surface. Removing the objective barrel to get at the objective lens internal surface of miniature Central Focus binocular models where the objective lenses are adjusted to focus is a bit more involved than it is for Independent focus models or center focus binoculars that move the ocular (eyepiece) lenses to focus. The following procedure will outline how to do it. |
|
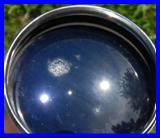
Some fungus on the objective lens internal surface |
|
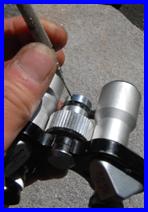
Remove the end cap. In this instance the metal end cap is threaded and is also secured by a small set screw. Check carefully for a set screw! |
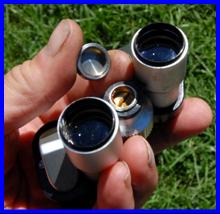
|
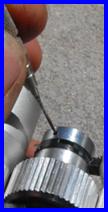
Remove the objective barrels, using special care to ease the plastic ring from the center without breakage. They can snag on the threads and they are quite fragile! Take note of which ring for which barrel is on top of the other. |
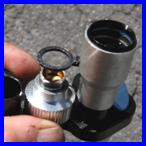
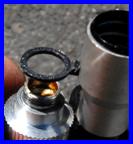
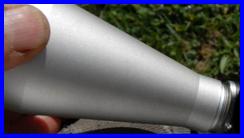
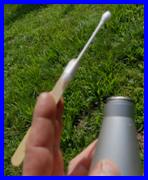
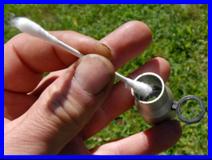
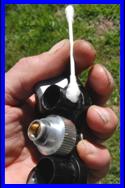
|
Clean the inside surface of the objective lens with a bit of cleaner on a cotton swab. |
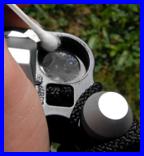
|
Unscrew the objective lens barrel |
|
Clean the sliding surfaces of the objective barrel and lube with silicone grease for low friction movement. |
|
Clean the exposed prism surface |
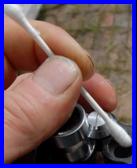
|
Then reassemble in reverse order. |
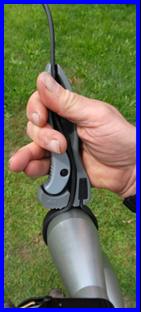
|
A rubber strap wrench can be used to help unscrew the objective lens barrel on larger models. |

|
+ |

|
+ |
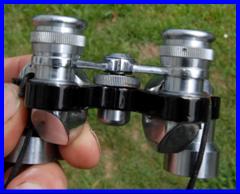
|
Many center focus binoculars move the oculars (what you look into). For the purposes of cleaning the objective lenses, the objective lens barrels on these remove the same way as independent focus binoculars, by simply unscrewing. |

|
Proper long handle swab |
|
Ersatz improvised “hillbilly engineered” long handle swab: a regular swab taped on a frozen pop stick. Reaches inside the barrel OK but wobbles a bit. This is the kind of thing you do when people can’t see you... But it works. |
|
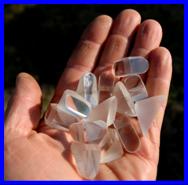
When attempting to substitute prisms, you need a good selection of potential donor prisms. |
|
IF THE DIOPTER RING SCREWS DO NOT WANT TO UNSCREW, SEE THE PAGE MORE REPAIRS, SECTIONS Uncooperative Screws. Repair Tip #1. AND Uncooperative Screws. Repair Tip #2. |
|
! |
|
Enjoy. |
|
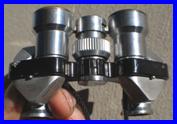
Note: these instructions apply to INDEPENDENT FOCUS BINOCULARS ONLY. |





|
When you have already cleaned the external ocular and objective lenses and look into miniature binoculars from the objective end (backwards), if you still see dirt or specks or fungus, it is most likely on the prisms or internal objective lens surfaces. With independent focus binoculars the objective barrel is usually easy to remove and usually gives access to the objective lens internal surface and one prism surface. Fungus is a microbial living organism that eats dust and whose branch like mycelium fibrils act like feeder roots. The problem with fungus is that it also produces a digestive acid that etches and can ruin optical glass. So an attempt should be made to kill/remove fungus whenever possible. For killing living fungus, Leitz documents describe a treatment made of 94% distilled water, 4% clear ammonia (for cleansing) and 2% hydrogen peroxide (to kill the fungus). Healthy doses of radiation will also kill fungus, but hydrogen peroxide is usually easier to get in most localities than radioactive radium isotopes. |
|
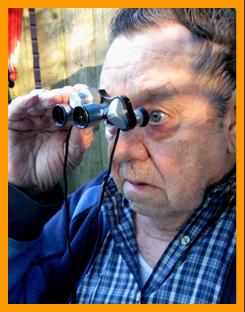
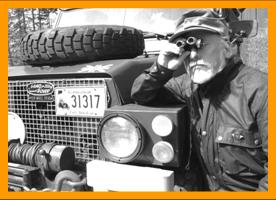
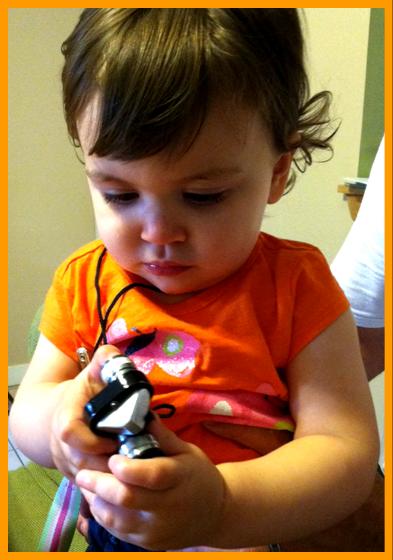
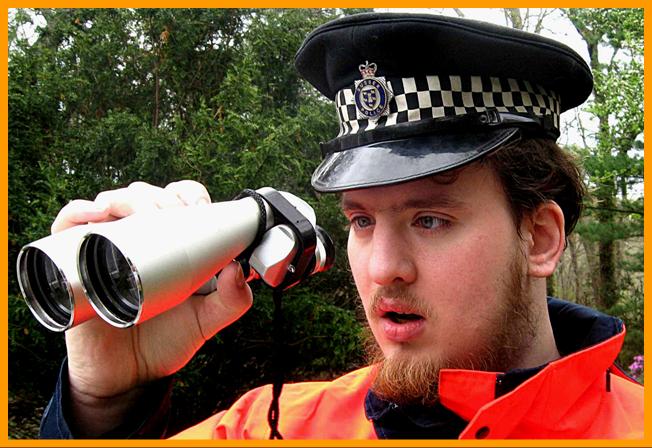
Yes, I can clearly see his patch |
|
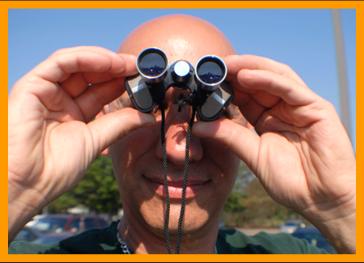
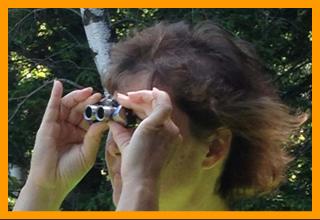
Is that the mailman I see coming with stacks of boxes of binoculars ? |
|
CONTACT US WITH INFORMATION OR COMMENTS: miniature.binoculars@gmail.com |
|
Fernglas-Reparatur, Réparation de Jumelles, Ремонт бинокля, 双眼鏡修理 |
|
Kikare Reparation, Reparación de Prismaticos, Riparazione del binocolo |
|
BINOCULAR REPAIR |

|
Miniature Binoculars, Jumelles Miniatures, |
|
Mark Ohno |
|
FOR OUR MILITARY & FULL SIZE BINOCULARS see sections OTHER BINOCULARS & BIG & SMALL |
![Text Box: CLICK ON PAGE LINE. CLIQUEZ SUR LA LIGNE DE PAGE. KLICKEN SIE AUF SEITENZEILE. HAGA CLIC EN LÍNEA DE PÁGINA..[ページ行]をクリックします。НАЖМИТЕ НА СТРОКУ СТРАНИЦЫ. ALSO SEE INDEX.](image676.gif)

